Postwar Alco and Modern GP7/9 Interiors
Interior
for 200 series Lionel Postwar Diesel Alco engines Version 1 For
Alco's with a Vertical Light mount
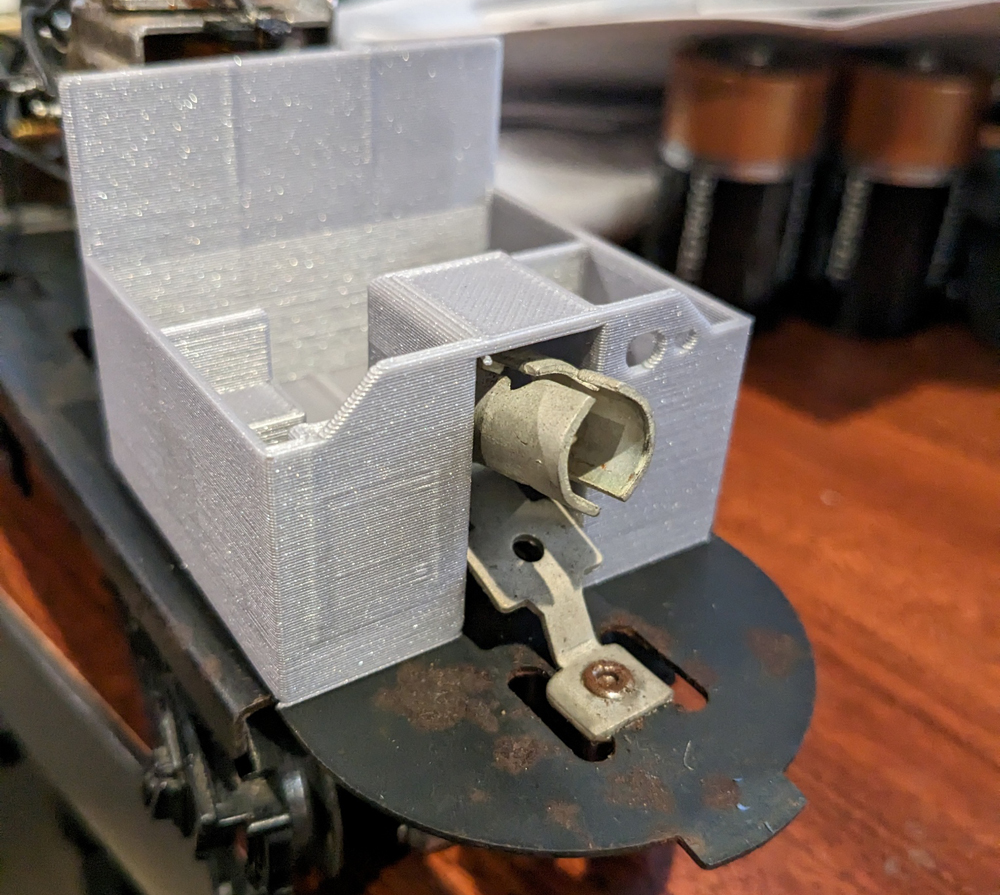
This
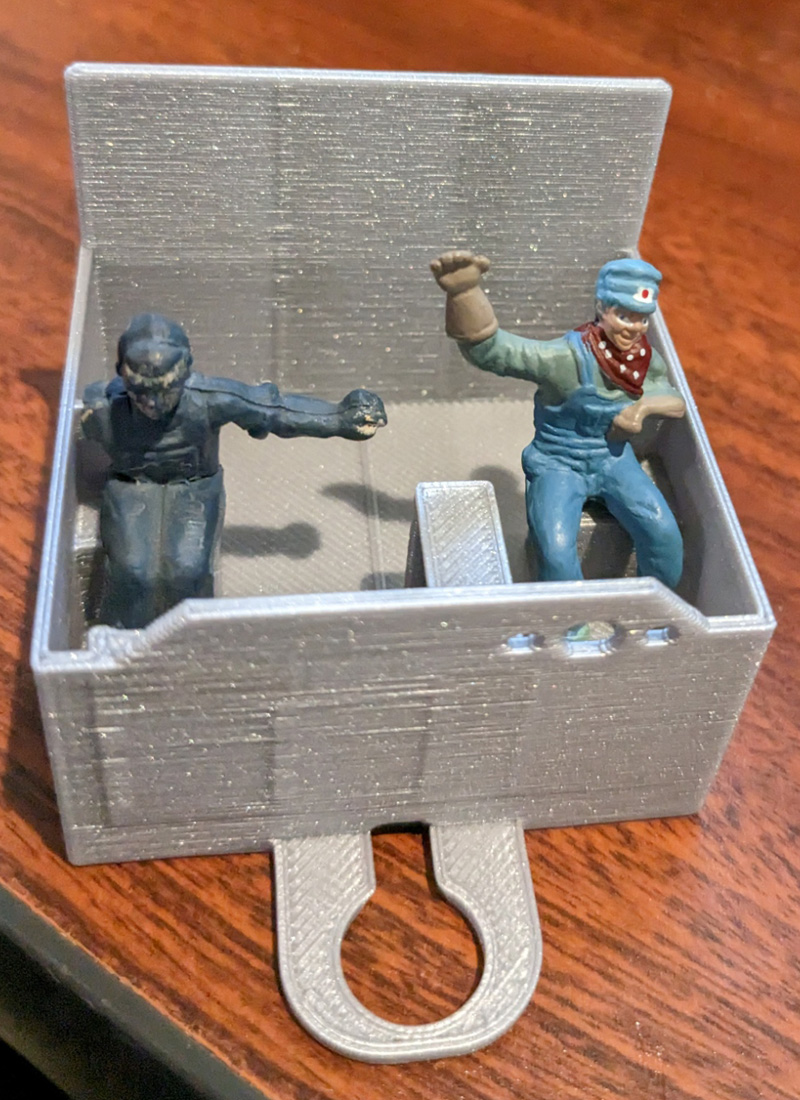
is a rudimentary interior and seats for engineers.
Requirements.
This is for the sheet metal base Alco with the vertically mounted light.
The Horizontal mounted light will not work. It will not work if a horn
is installed, the Horn Relay takes up the cab room.
A standard window for the Alco must be installed. This interior is made
to work and align with the window in place.
An LED light is needed. Since this is close to the light and keeps the
heat in one area, it may cause melting of the cab or interior.
Design
Considerations
- This
is designed to be part of the assembly without glue or tape. It can
be taped or glued if you desire.
- The
side height stops at the bottom of the window shell.
- The
width fits snugly in the shell.
- The
front loop goes around the light bulb base. This and the fit in the
shell positions the interior.
- There
is a groove in the bottom to allow the light bulb wire to pass
underneath.
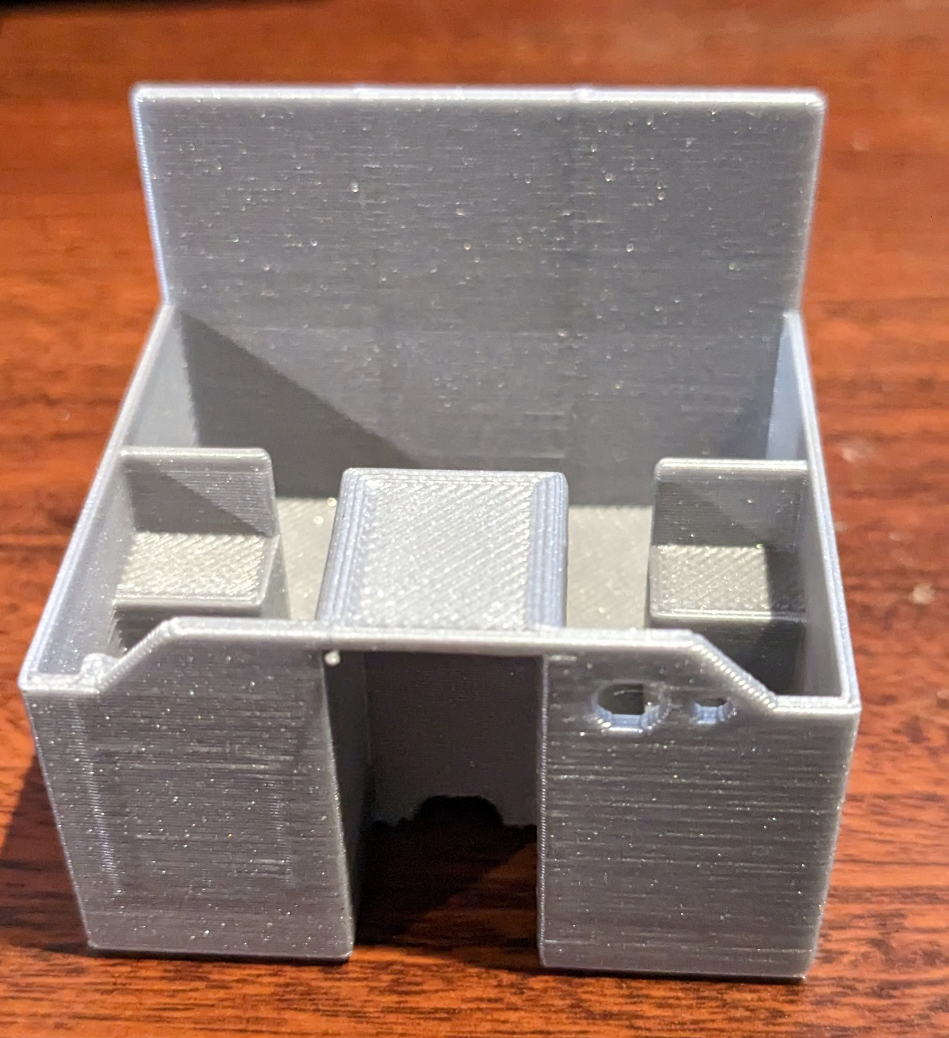
- The
seat height was set to position an O scale seated figure. Figures
vary so height may need to be adjusted.
- The
three Gauge holes allow light in to better illuminate the engineer.
A decal could be placed over them if desired.
- Supports
are used to stiffen the back wall.
3D
printing
I did this in .3 mm layers using PLA. A light color is recommended if
you want to see any details or better reflect the light.
Printed with the bottom on the printing sheet. No supports were used.
Interior
for 200 series Lionel Postwar Diesel Alco engines, Version 2
Works with any 200 Series Alco
This
is for the sheet metal base with the horizontally mounted
light. It will not work if the original horn is
installed, the Horn Relay takes up the cab room.
A standard window for the Alco must be installed. This
interior aligns with the window in place.
An LED light is needed. Since this is close to the light and keeps
the heat in one area, incandescent bulbs may cause melting of the cab or
interior.
Design
Considerations
- The
side height stops at the bottom of the window shell.
- The
width fits snuggly in the shell.
- There
is a groove in the bottom to allow the light bulb wire to pass
underneath.
- The
seat height was set to position an O scale seated figure.
Figures vary so height may need to be adjusted.
- The
2 Gauge holes allow light in to better illuminate the
engineer. A decal could be placed over them if desired.
- Supports
are used to stiffen the back wall.
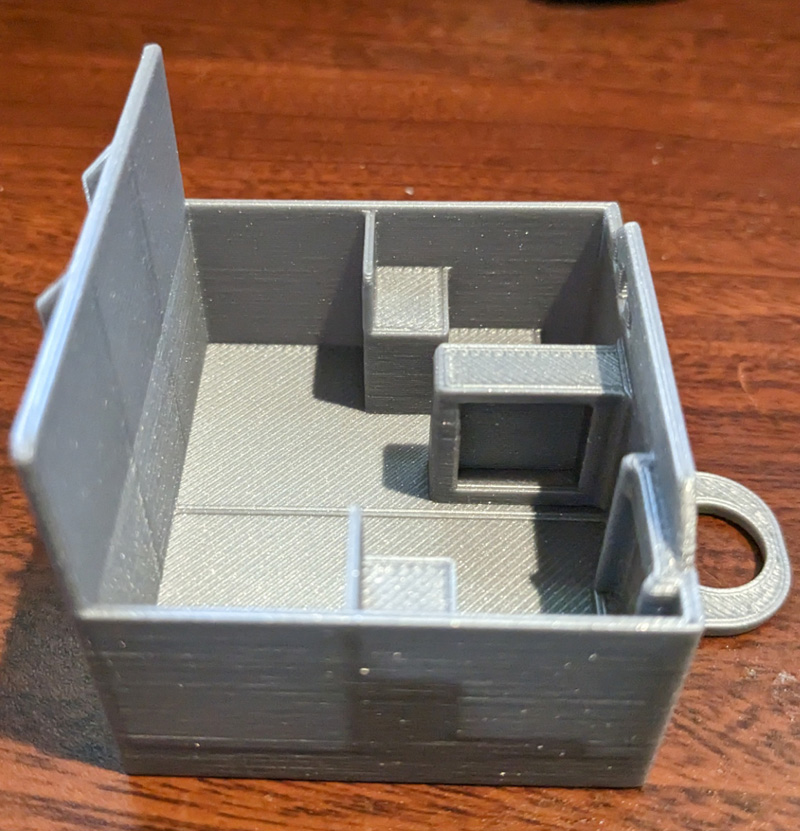
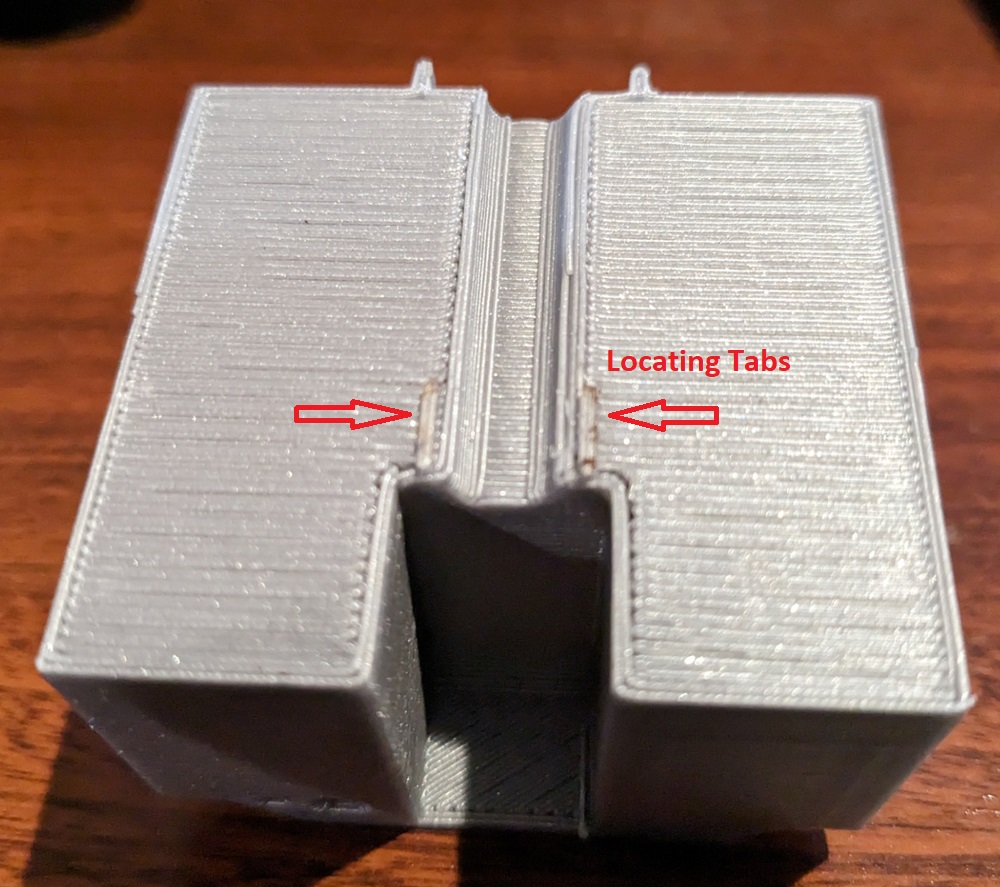
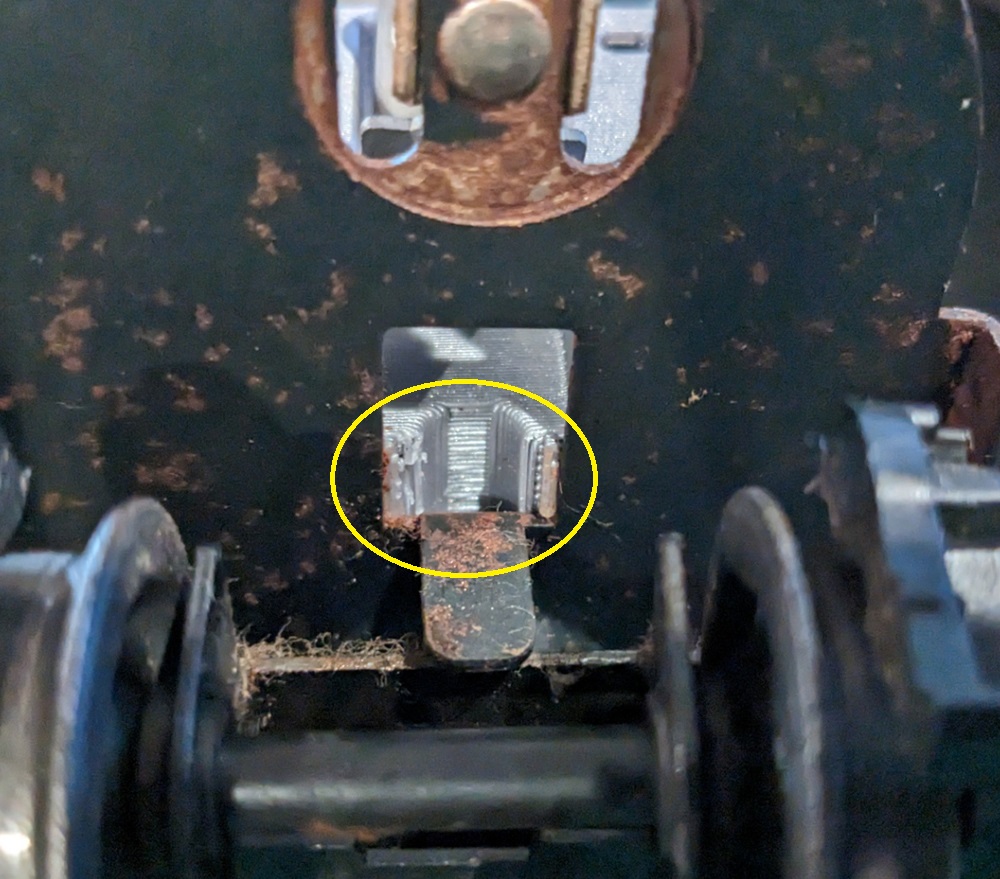
There
are 2 small locating slots on the bottom that fit the notch in the
engine. If it moves too far forward, Hot Glue or similar may be
used here to glue in if desired. 2nd picture below.
The
light wire may need to be replaced or lengthened if the original is too
short and gets in the way of the interior. If original wiring,
it’s age may cause the insulation to crack if moved and most likely
needs to be replaced.
This version can also be used if the light is vertical. Hot Gluing
is recommended with the vertical light.
3D
printing
I did this in .3 mm layers using PLA. A light color is recommended
if you want to see any details or better reflect the light.
.2mm layers with quality positioning should make smoother walls if
desired. Printed with the bottom on the printing sheet. Supports are
needed for the bottom and the cutout notch. Be careful removing the
supports and don’t cut or break the 2 small locating notches.
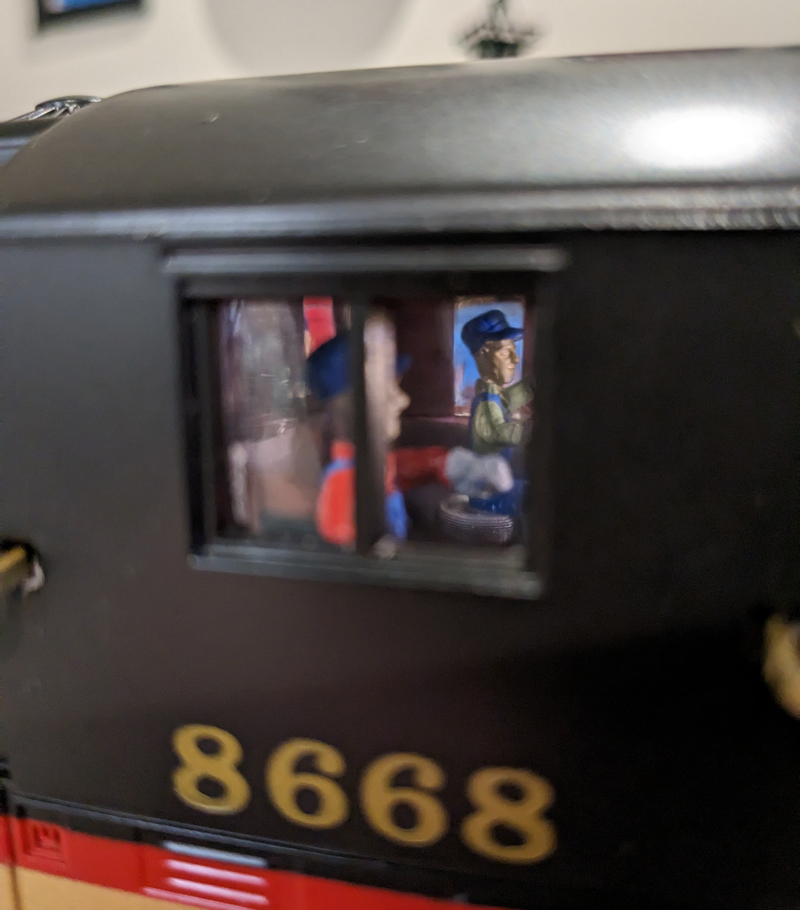
Modern
GP7/9 Dummy interior
Requirements
A true dummy frame. It will not work with a motor
installed. The 8668 Northern Pacific dummy was used for fit
testing.
A
light is needed if you want to see the interior well. This will
require adding a pickup. The MPC dummy did not come with lights or
pickups. The mounting and screw holes are in the truck for a
pickup. The frame has a wire slot near the rear truck. I
recommend LED lights. The GP9 does have large exhaust holes front and
back so heat buildup may not be a problem with incandescent bulbs.
Lionel
Parts needed for adding a collector.
- 2328-170X
Black Plastic Collector Insulator
- 2328-171
collector plate assembly
- 2332-109
insulating washer
- 6
x 5/16 slotted, round head self-tapping screw to mount it to the
truck.
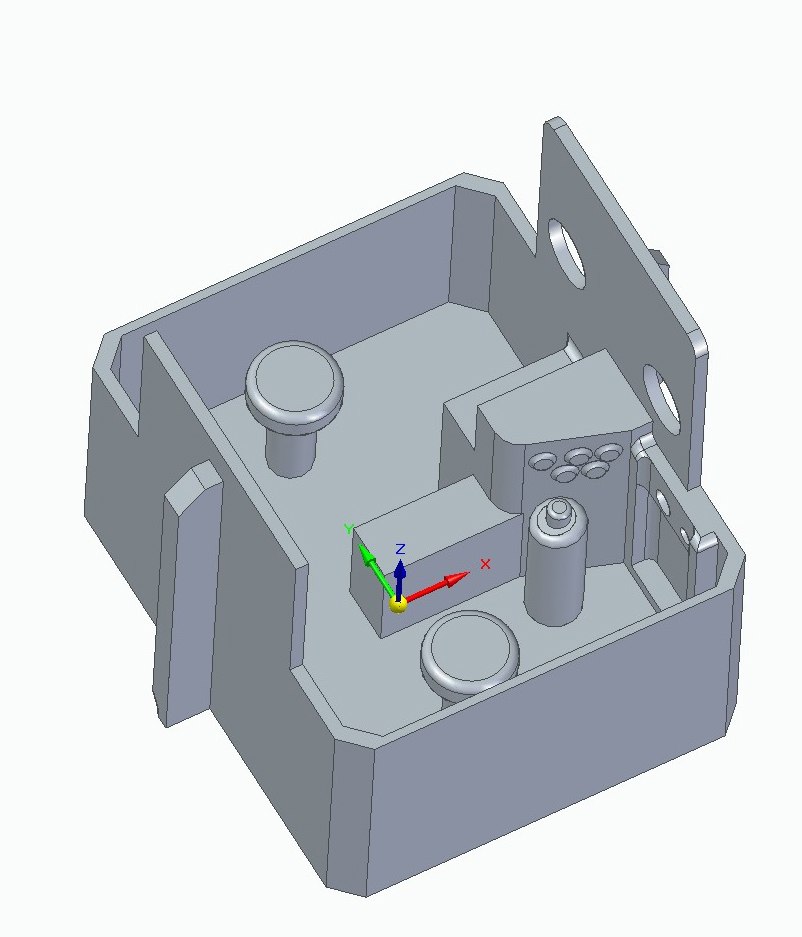
Design
Considerations
- The
side height stops at the bottom of the window shell. The
window may need slight cleanup of sprues and burs.
- The
front and back walls go to the top of the shell or window.
- The
width fits in the shell.
- There
is a groove in the bottom to allow the light power wire to pass
underneath as needed. It is offset to keep the wire from
rubbing on the truck mounting pin.
- The
seat height was set to position an O scale seated figure.
Figures vary so height may need to be adjusted.
- The
2 large holes allow light from an added headlight or LED to better
illuminate the engineers and interior. LED lights could
be added at the holes to illuminate the interior
also.
- Supports
are used to stiffen the front and back wall.
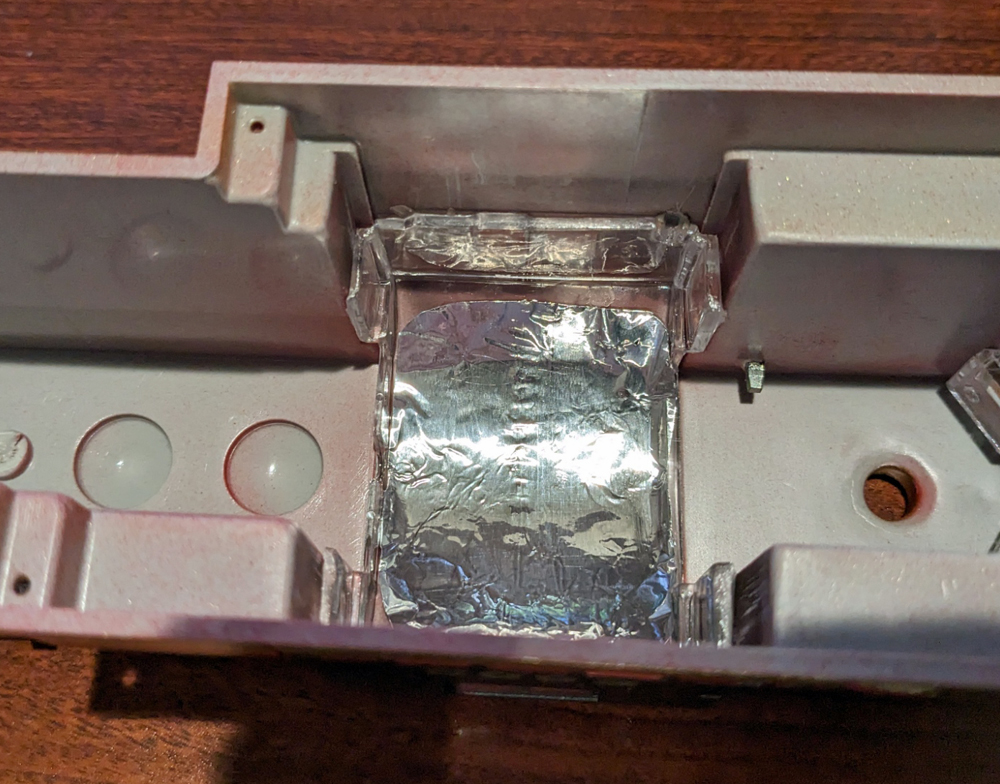
Aluminum
foil is added to help reflect the light when a light source is
used. Figures are purchased O scale figures.
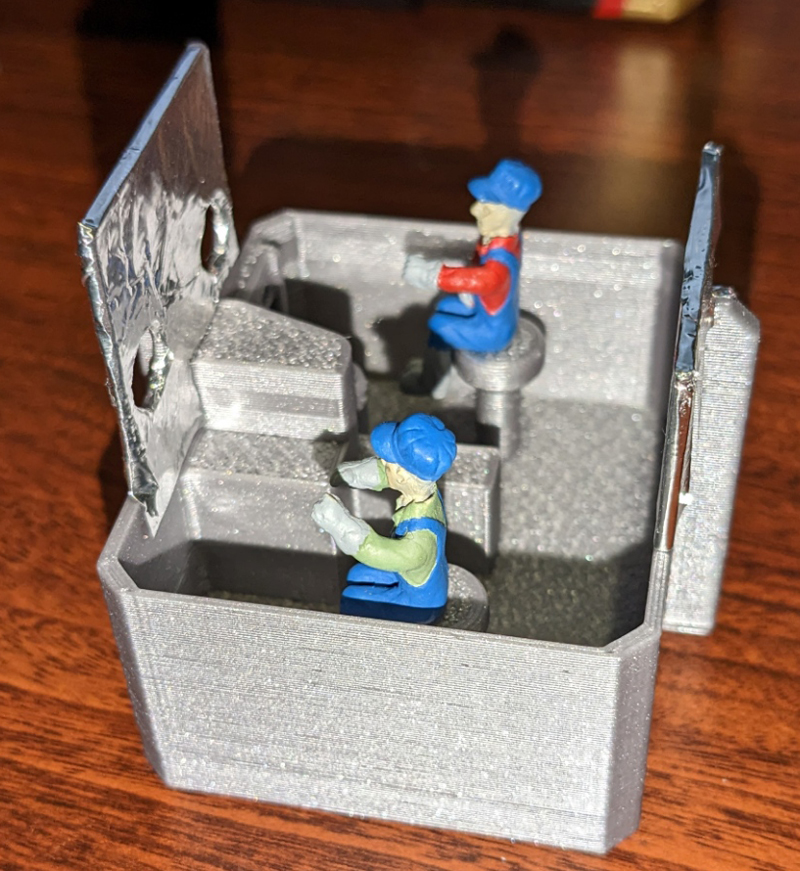
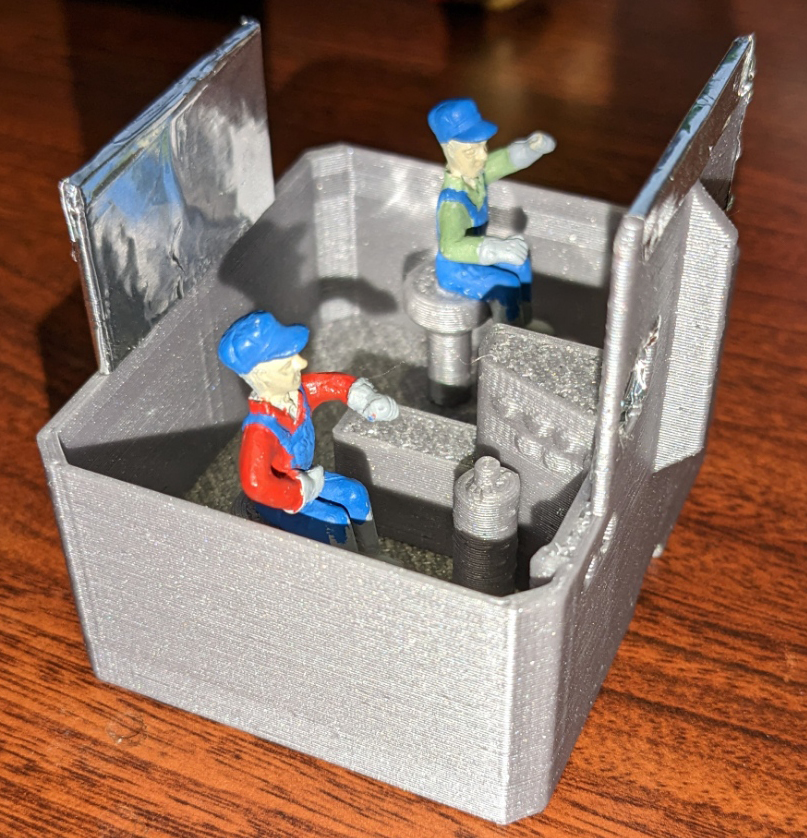
I
added aluminum foil to the cab top also to help reflect the light.
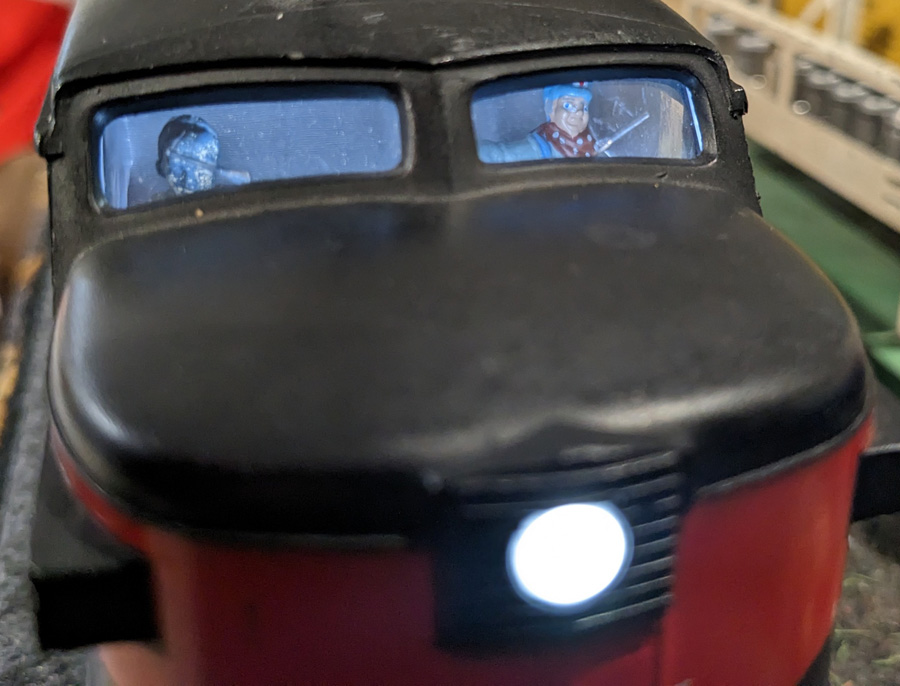
The interior slides in and fits in the cab opening. No other
mounting is needed once the shell is re-attached.
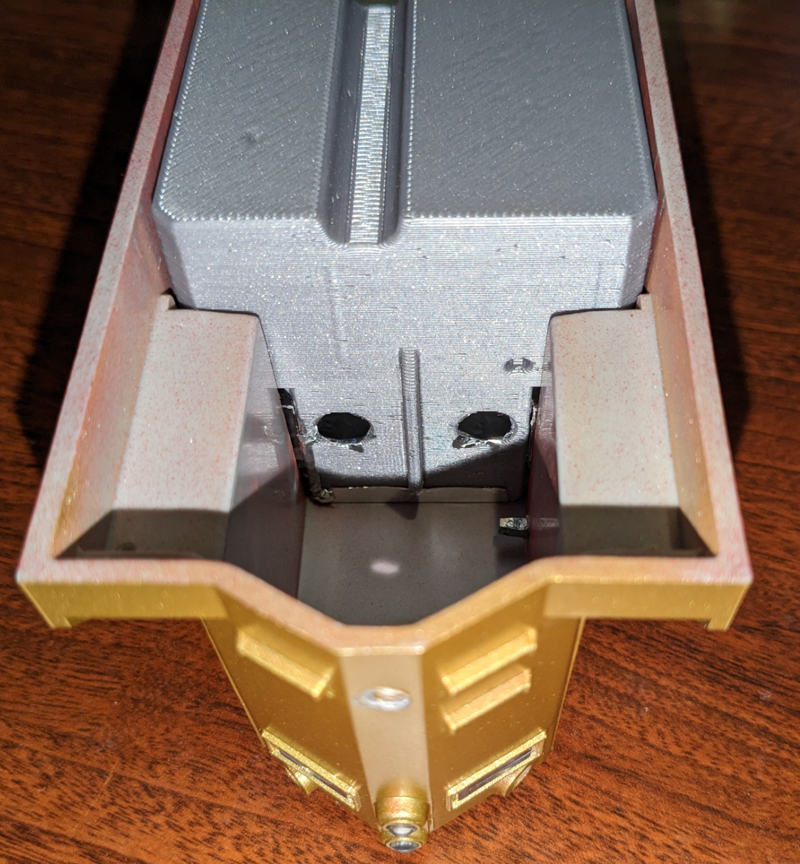
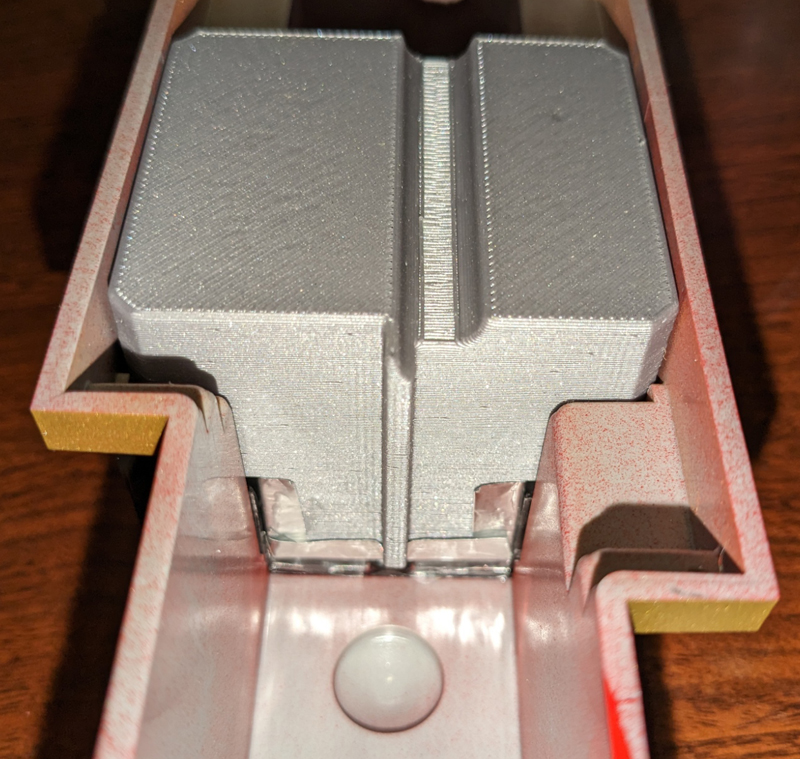
Interior
installed along with optional LED lighting listed below.
3D
printing
I did this in .3 mm layers using PLA. A light color is recommended
if you want to see any details or better reflect the light.
Paint as desired. Fine details such as control levers can be made
from pins if desired.
.2mm layers with quality positioning should make smoother walls if
desired. I used Hilbert Curve for the top layer to give it
an anti-skid look. If you want a smooth top surface, Ironing
will be required. Printed with the bottom on the printing
sheet. Supports are needed for the bottom wire channel and the 2
holes. A slicer with Organic supports works well.
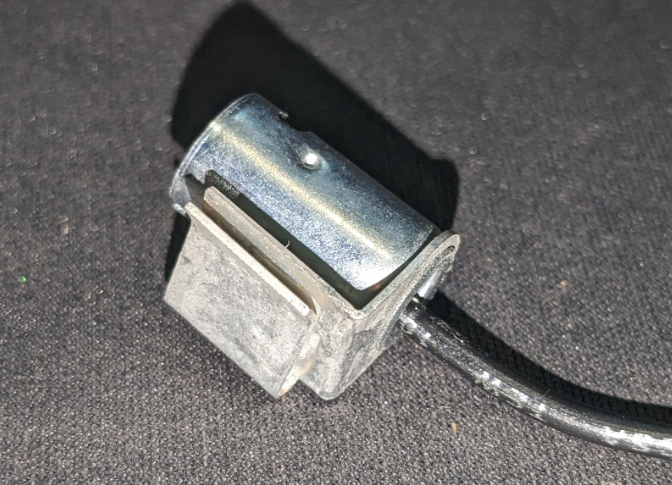
Adding a light to a GP7/9 dummy
To add a light bulb to the MPC Era GP7/9 dummies a socket similar to
Lionel 2321047 lamp socket is needed.
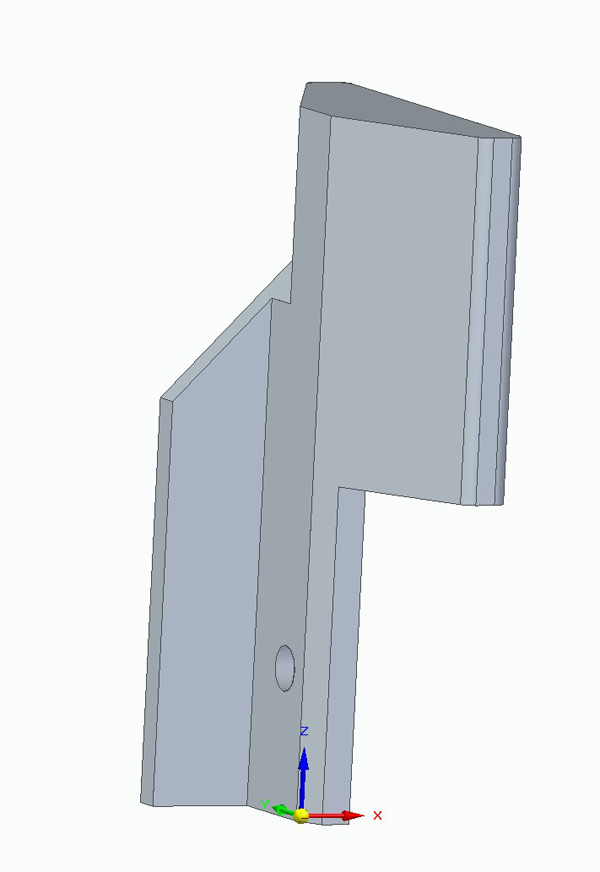
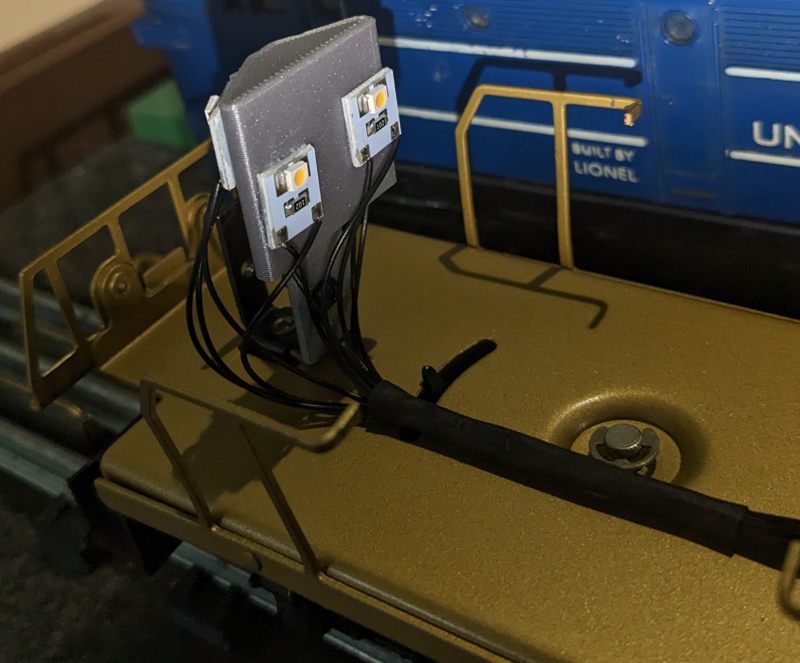
Included in these files are a GP9-lightmast.stl and .stp. This is
an optional way to mount LED lights for the MPC era GP7/GP9 dummy.
A self-tapping screw is needed to mount the light mast.
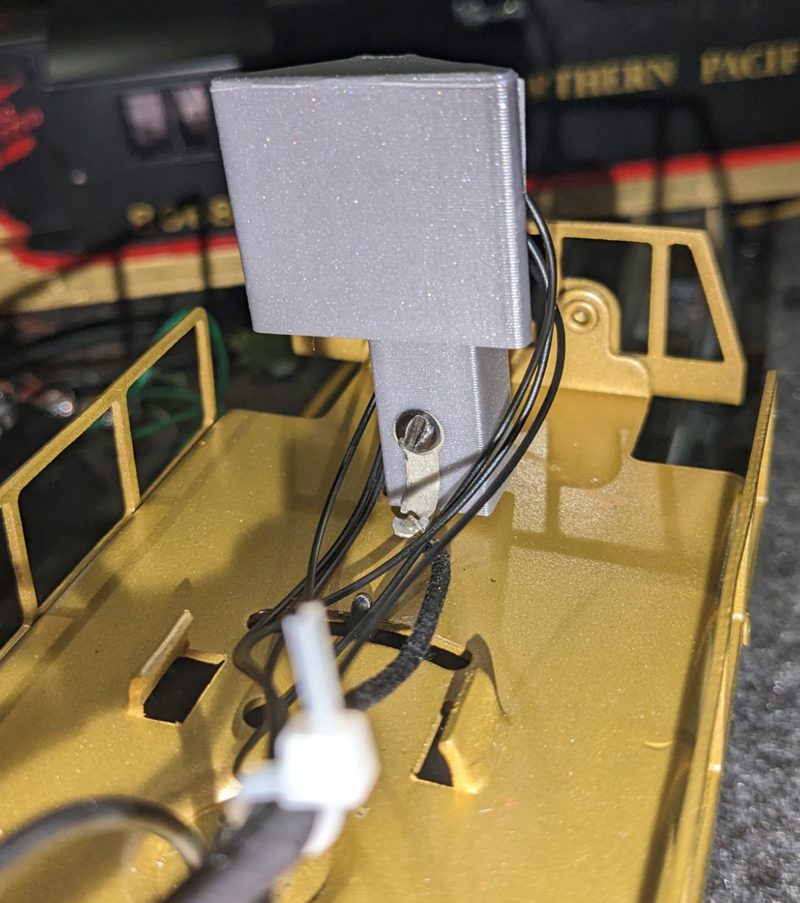
This
mount is designed to follow the contour of the GP7/9. It can also
be reversed so the LED lights shine directly forward.
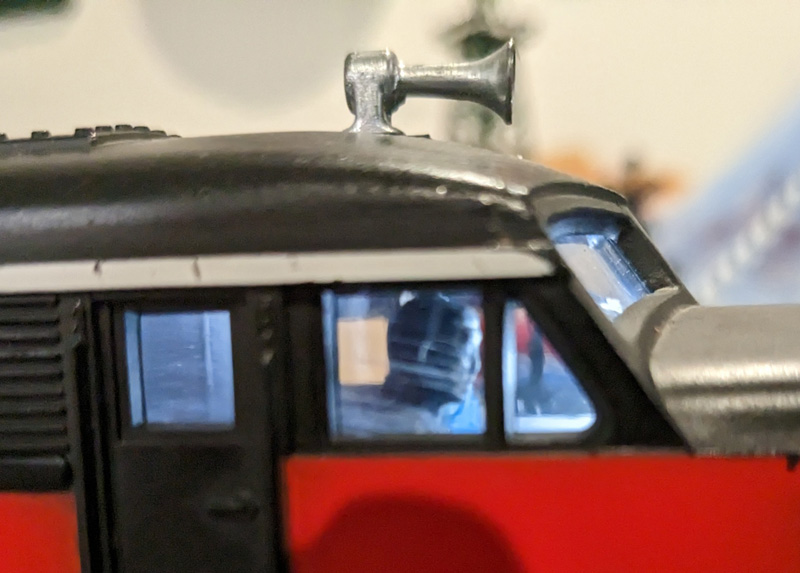
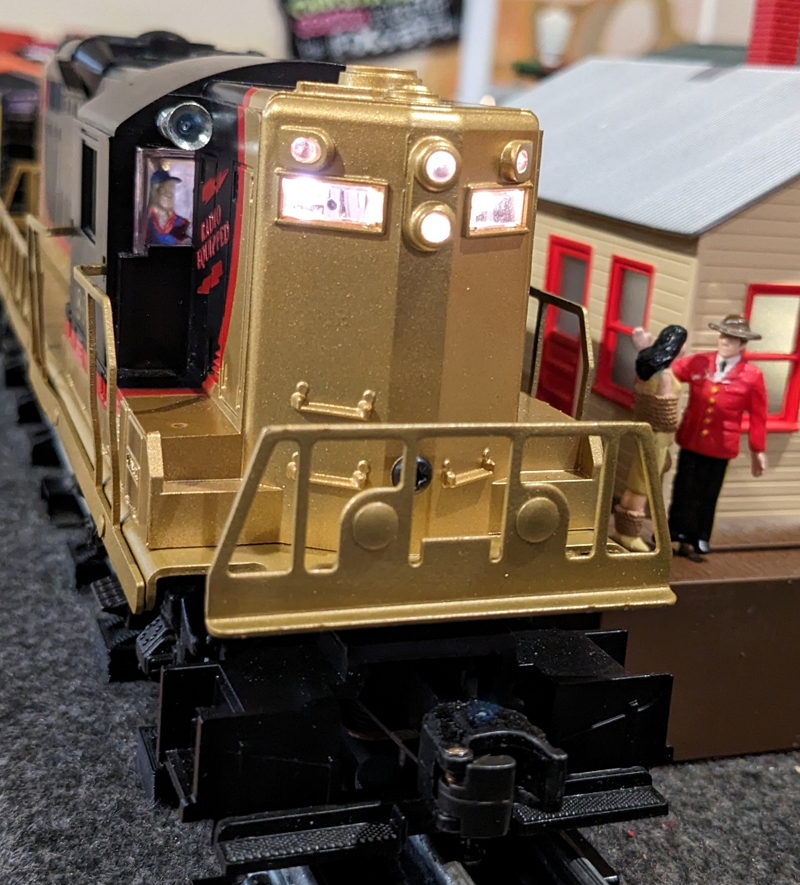
Mounted
in the GP9 with LEDs attached. 2 LEDs illuminate the
interior. The second picture also shows the mounting screw has a
solder lug attached. This is needed for Grounding the lights or
power supply.
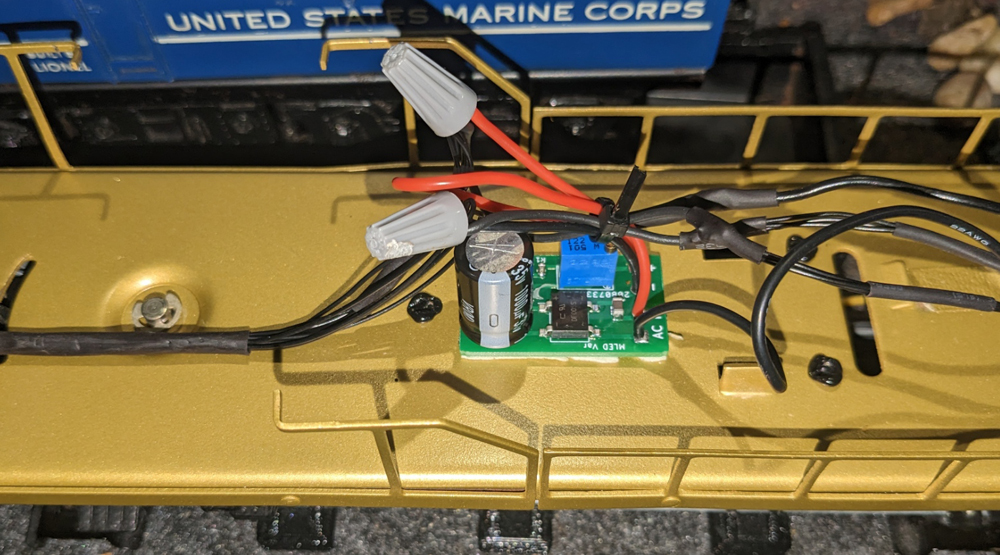
In my
case I used a power supply to drive the LED lights, even though the LEDs
are rated for 18V AC. This allows constant lighting across
switches and other interruptions. It also allows me to adjust the
voltage to the LEDs and control the brightness.
Last update Jan 24 2026