For What Its Worth
66 Stock Power Brake Booster information
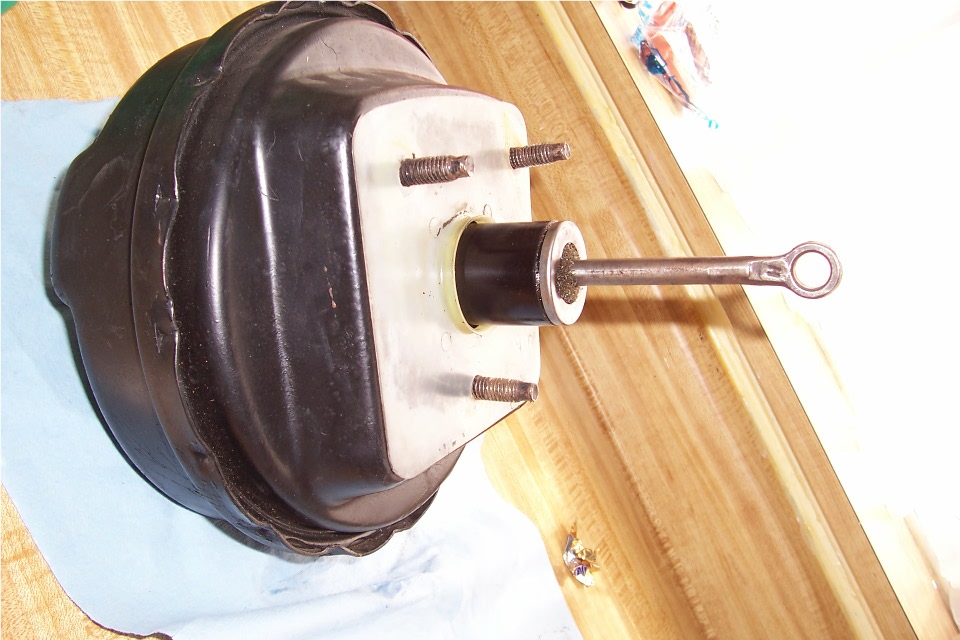
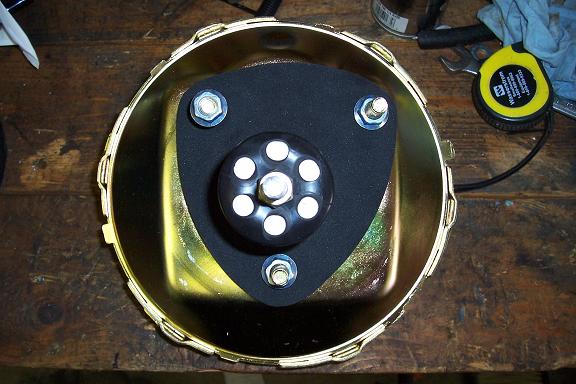
This is a 8-9" single diaphragm booster for the 64-67 Chevy II. (I hope). About 4.7 inches thick, from firewall to the master cylinder nest surface. Bolt pattern, top two bolts 3.375 Bottom bolt is 3.375 down, but not centered left to right. The Rod assembly and bottom bolt are offset .375 to the left. To account for the rod attaching on the side of the brake pedal instead of the center.
What is the difference between a power booster and your manual brake and your pedal. A few things, but one of the biggest complaints in a Chevy II is not enough pedal travel. First review this information and then see my pedal travel conclusions.
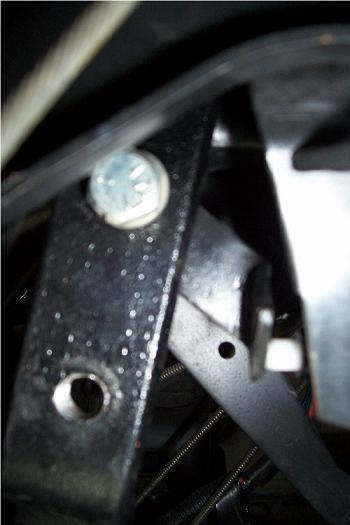
- You need a brake bracket to stiffen up the bottom bolt the booster has. This third bolt is not used in manual brakes.
- You mount the brake rod for the booster in the lower of the two
holes on the brake pedal. The center of the booster is lower than the
manual brake location. This gets the correct rod alignment.
It also gives more rod travel vs. Pedal travel. Pedal doesn't
move as far, but it doesn't have to. In this picture the
top hole holds a bracket for the brake light switch. Often needed
since the switch wont adjust out far enough for the new pedal position
with the booster.
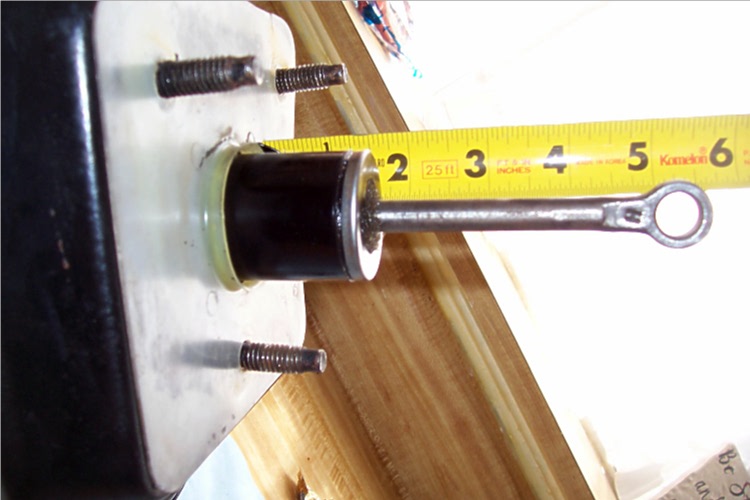
- Stick out of the rod and plunger is 5 .25" on my booster. If yours is different let me know! They may
vary depending on the car they were used on.
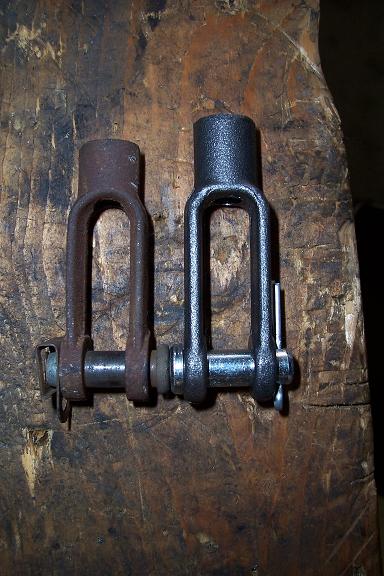
- The manual brake cylinder uses a clevis. The center of the
master cylinder left to right is aligned with the center of the
pedal. The
clevis threads onto the rod and is adjustable. Not too much
adjustment. If the rod sticks too far into the clevis it will
interfere with the brake pedal as it moves.
- The power booster uses a rod with a round end, that mounts on the
outboard/left side of the pedal. In fact the booster rod &
plunger is offset sideways. to account for this. .375 offset.
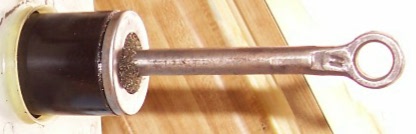
- The rod on the power booster is not adjustable and can not be
removed from the booster. Here is a picture with the cover and filter
removed. I have looked in the Motors service trade manual and
trust me, it doesn't come apart without tearing it all apart.

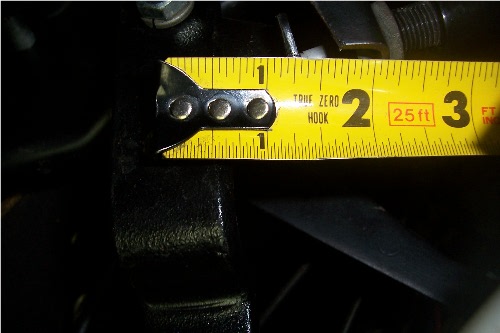
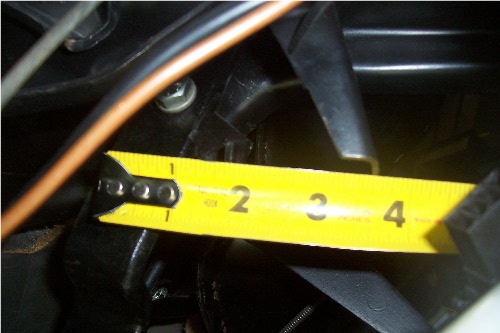
- The power booster from my measurements travels 1.63 inches max. The rod and the black cylinder valve assembly move together.
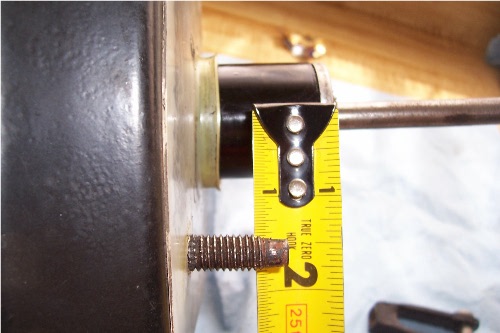
- How much does my pedal travel? Getting this measurement is
fun. First picture is in Free state. Or pedal up with
booster. The best
I can tell with it all apart. 2 1/16" to my brake light bracket.
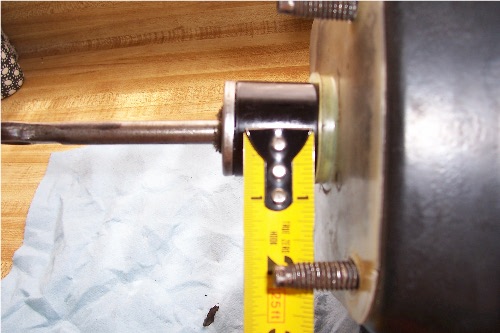
- How far down will it go? About 3.75" with the pedal on the
sheet metal floor. Total, right at 1.63 inches, the travel
of the booster.
Also see my Brake Bracket page for info on the manual to Booster conversion.
What is my conclusion? My 66' assembly manual says the brake pedal needs to be "4 inches +- .12 from top face of pedal to toe pan for normal position" with a power booster. Mine was a little bit low. In my case the pedal hitting the floor and full travel was about the same thing. (Panic stop condition in some cases) Is that OK? When there is sound deadener and carpet added in the future, it wont be. Also the feel that low just isn't what I am use to. You don't normally use full travel if the brakes are good, no air in the system etc. Are there fine differences between 64-65 and 66-67 pedals that cause the pedal to appear too low? Is this a 64-65 booster vs. 66-67?. I don't know, I only had this one to measure and it may have come from a Gen 1 car.
If you need to adjust the pedal there are some options. Warning, these are critical brake components, take care with any modifications.
1. Cut the end off the rod, thread it and put a clevis on it. Will it work? Some have done it, but remember the offset in the mounting, the rod will now be at an angle and there may be some binding in the clevis if you are not careful. Also the booster is not designed for sideways pressure and may cause wear problems. This appears to be a forged rod, not held to a tight OD. Some work will be needed to thread it.
1.A Cut the rod and thread both sides and use a union and lock nuts to adjust. Is there enough rod to do this?
2. Adjust the pedal curvature/angle. This is done by making strategic cuts in the pedal, bending it and getting a great welder to weld it back up. You make the pedal higher while leaving the mounting points alone.
3. Fab a short extension from the brake pedal.
4. Find a different style booster. Many aftermarket ones come with a threaded rod. Usually they come with a 4 bolt pattern and the master cylinder centered. That is great with a clevis. Two holes would need to be added to the firewall and a bracket between the bottom bolts to tie in with the re-enforcing bracket. Also cutting of the firewall some to center the booster. Also there are dual diaphragm options, as long as it isn't too long, but a Chevy II is a tight fit.
After due consideration I decided to buy a new booster designed for a Chevy II
A booster that would adjust and possibly work a little better. The original was OK, but any improvement helps. I learned few really know these 1st and 2nd gen Chevy II boosters. First place I tried to order from said it would ship "tomorrow no problem". 2 weeks later they refunded my money. It was going to be another month. Many places list a picture for the booster but a little checking shows many of the pictures are generic and you don't know for sure what you will get.
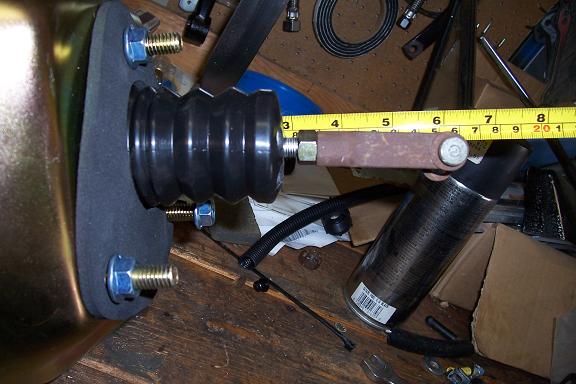
Next place I ordered from, no problem. The booster they sent is a CPP single stage booster. The online picture showed a heim joint to attachment to the Brake Pedal. That would be perfect since this booster is also offset the same as the stock one to fit the firewall. But it came with a clevis. See pictures below. Is that a problem? I think so, see #1 above.
Nice n shinny new booster with the stock offset.
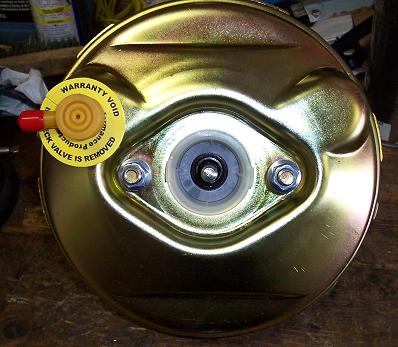
The front. 2 advantages over the stock one. First the check valve is on the correct side. Next the Master Cylinder mount is recessed. Overall the Master Cylinder is closer to the firewall. No need to beat more clearance into the spring towers. Disadvantage is the travel is a little shorter, but I didn't write down exactly what it was. About a 1/4" shorter if I remember. I have had no problems bottoming out.
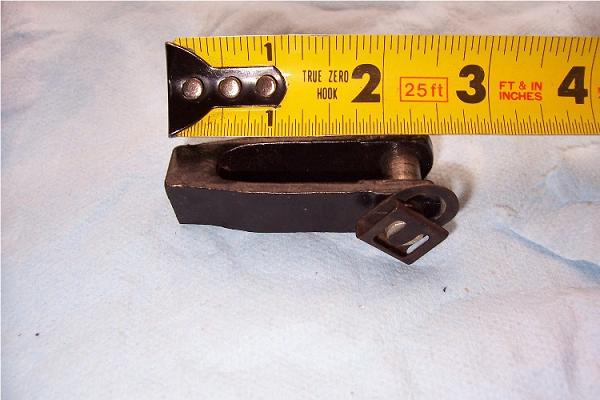
Clevis sent with booster vs. stock one. New one on right.
I went to Smileys Racing in Mesquite Texas and bought a male and female heim joint. I went near by to Eliots Hardware and bought the 1/4 28 female connector. Now I have enough to make it work no matter what. The trip costs more than the parts so I got whatever I might need in one trip.
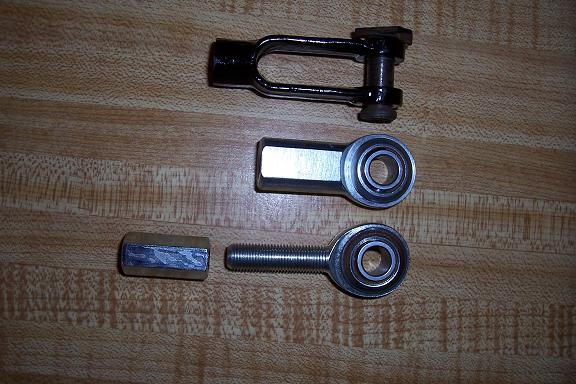
The heim joint in the middle worked and gave me the distance off the floor I wanted. Still lower than the manual, but that is OK. Also I used a big SAE washer with the bolt that went through the heim joint into the brake pedal. I have been in racing and seen the ball pulled out of a heim joint. The washer was just to make sure that if something ever did go wrong with the heim joint the washer would keep the end of the heim joint attached to the pedal.
Now for the street test! A little more boost than the stock booster. Can I "lock it up"? Yes, with the 205 front & 235 wide rear tires on a dry warm day. The key is the car stops great. See the CPP Master Cylinder page for the last part of the brake system upgrade that made the system work great.