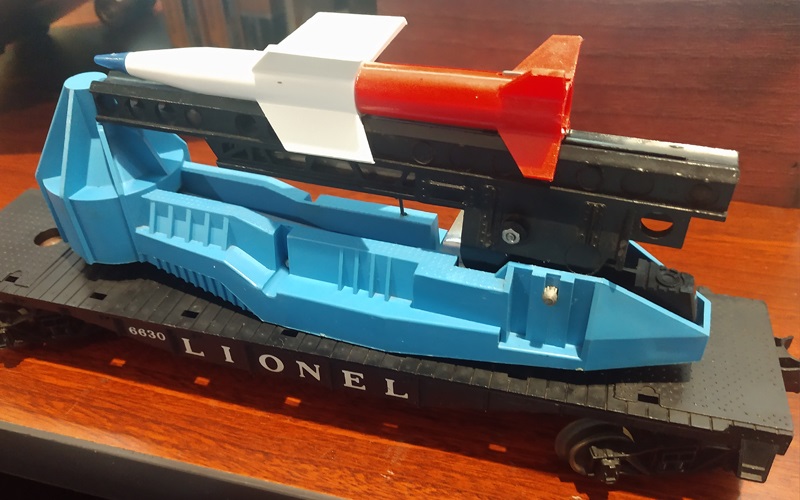
The Lionel missile launcher is simple, rugged and needs a little care to work reliably.
Today I am starting with a 6630 Missile launcher. It is sticky and hard to get to work right. It appears someone had oiled it with vegetable oil that had attracted dirt and become sticky. It needed cleaning.
First, I will remove it from the flatbed car. There is a C-clip that holds it on under the car, Carefully remove the C clip. Note the C-clip fits in a groove on the pin. When re-assembled the C clip needs to fit in the groove on the pin for proper spacing.
When the flat car is removed, there is a spring washer on the post of the launcher. It needs to be in good shape. If it stays flat or missing, it needs to be replaced. This keeps tension on the shaft and adds resistance to turning the launcher when the car is running. To keep it from spinning sideways in the turns. NO OIL should be used on this mount pin. The plastic body of the flat car provides enough lubrication. It needs to be a little stiff.
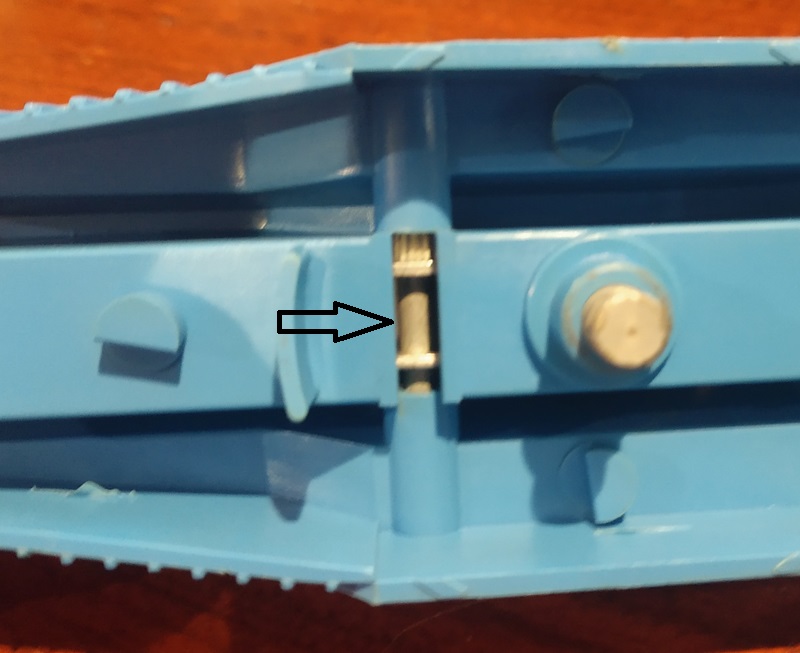
Now there are 2 pins that need to be pushed out. One holds the launcher, the other the pivot bar. Note the knurled end. Push the knurled ends out, do not push the knurl thru. One is barely in this picture.
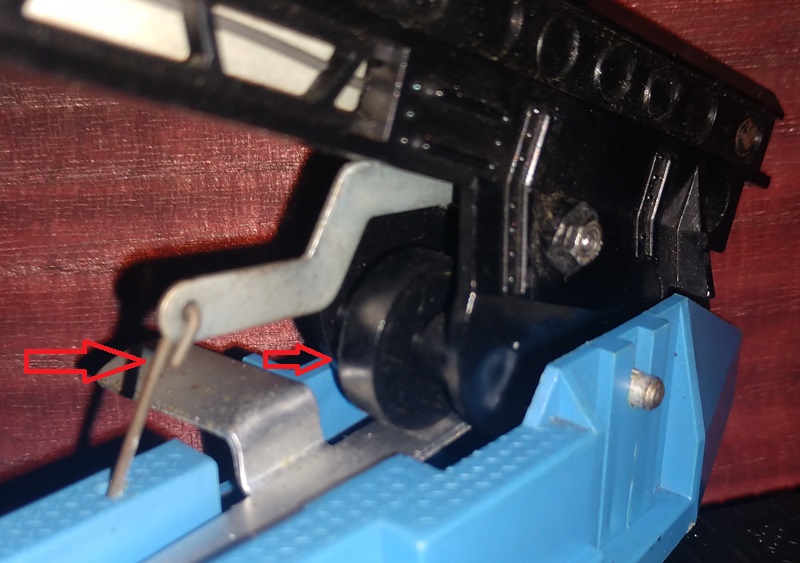
When taking off the top launcher, be careful of the trigger bar, in the middle of the picture below. It is just a simple wire with an L shape bend that goes into the plastic body. Careful angling of the trigger bar when the pin has been removed will allow you to remove the trigger bar. When re-assembling don't forget to put the trigger bar back in.
Also be careful about the trigger button. It has a coil spring under it, don't loose it if the button falls out.
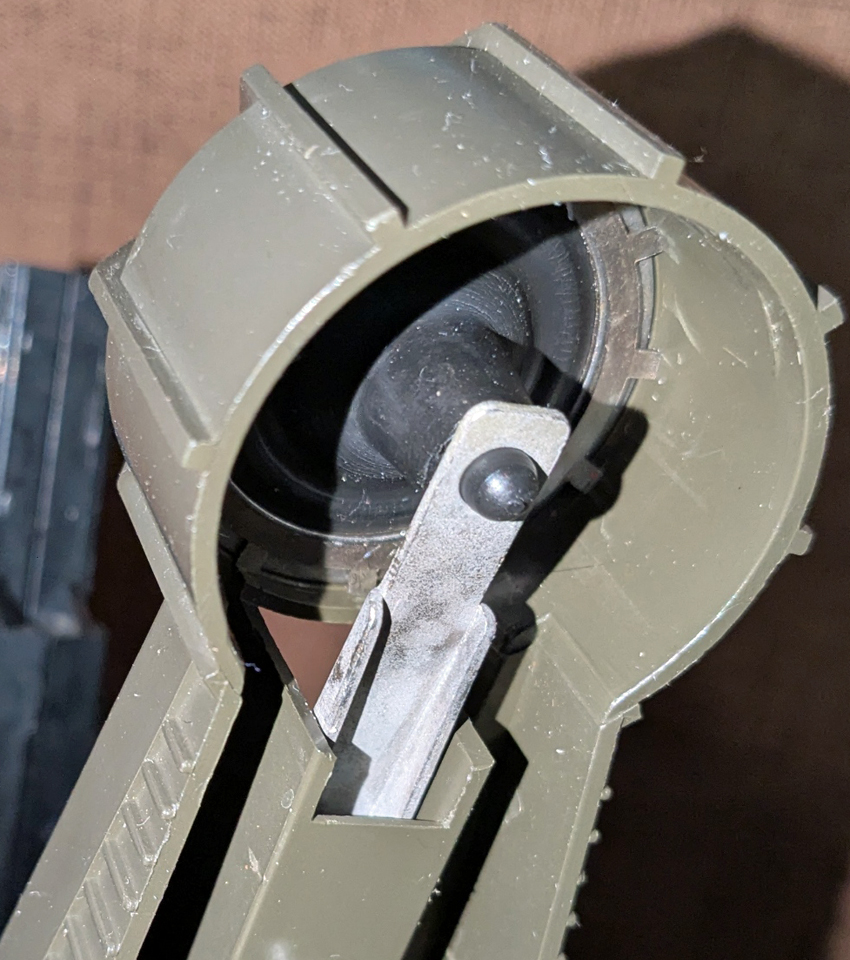
The top launcher is a riveted assembly and there is little to do but clean and check. Make sure the "wheel" spins freely. This wheel allows smooth easy movement when the pressure from the pivot bar moves the launcher up. Also make sure the trigger bar is not kinked or badly rusted. Another one can be easily bent from similar gauge wire if needed.
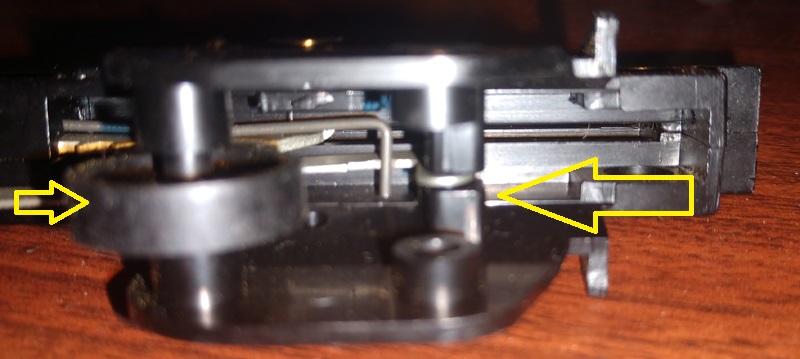
Check that the spring is good and not too rusty. If this spring is broken or weak from rust or time, a whole new mechanism may be needed. This part is riveted together and I don't know of repair springs etc for it.

Check where the trigger attaches on the right in the picture below. Also double check the wheel. On mine I found the area where the trigger mounted kept spreading apart. Which made it harder for the trigger to set reliably.
I noticed that there was an extra set of holes unused in assembly. 1961 Era 6630. Most likely part of the original design for a spacer/rivet and deemed not needed. In other 1960 era Missile launchers This hole and boss is not there. On the 6650 missile launcher from 1959-63 there are both versions. Which leads me to believe something in 1961 this was added to the mold.
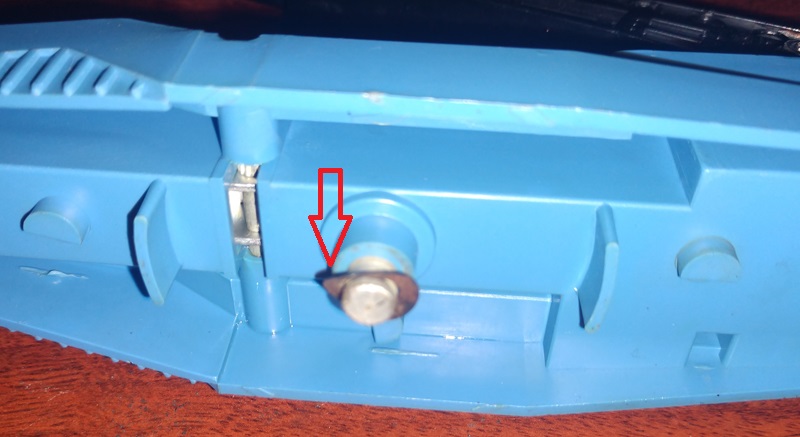
I found it great for using a long, 2 mm bolt and nut to better hold the spacing of the bottom of the assembly. Most may not need this kind of fix, but it helped this unit. Make sure the launcher is clean and free of dirt. Oiling is not needed. After 61 years this unit is almost like new except for some rust spots.
Now on to the base. Careful the trigger button falls out easily, don't drop it and loose it's spring.
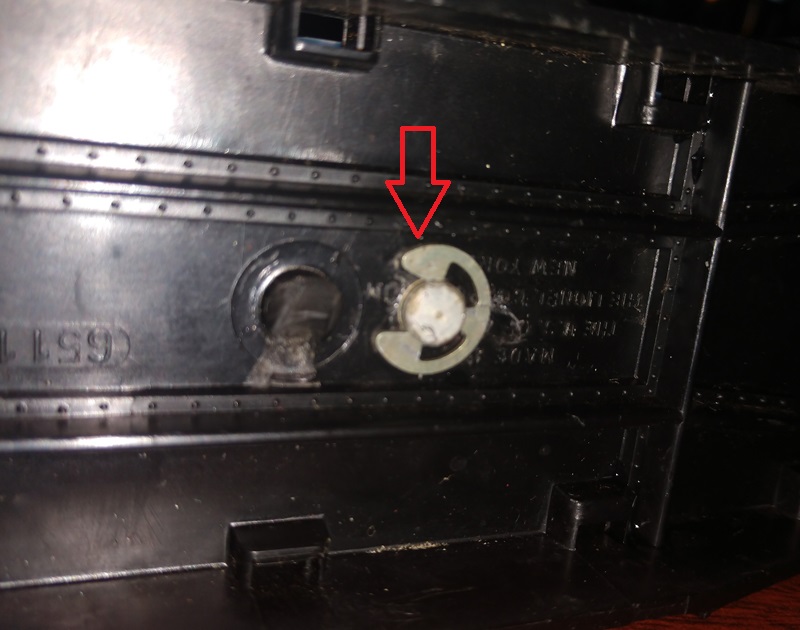
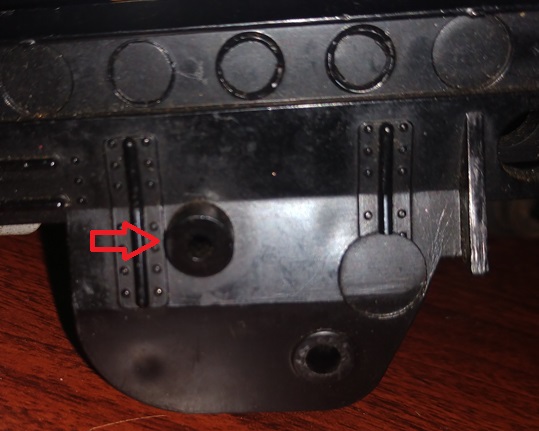
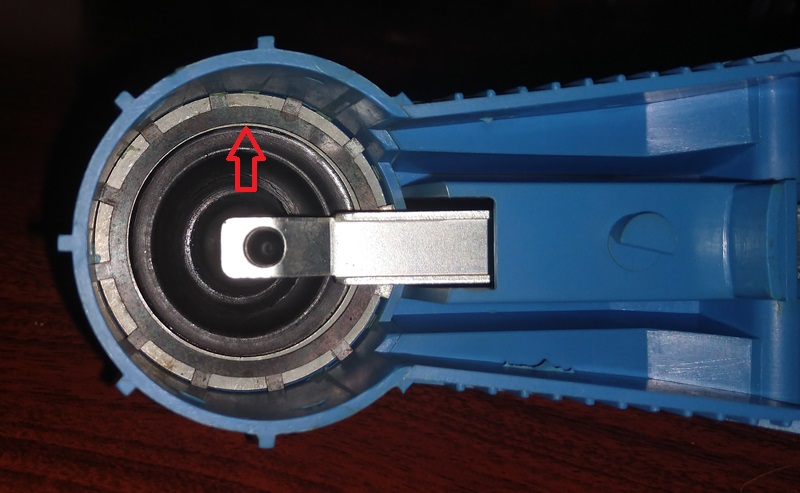
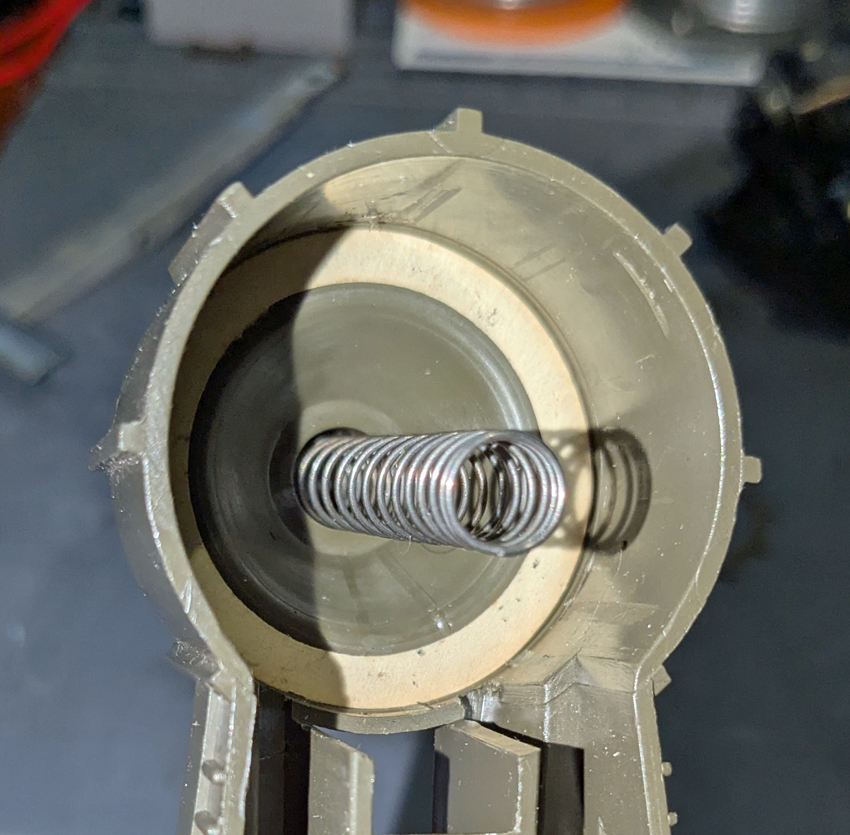
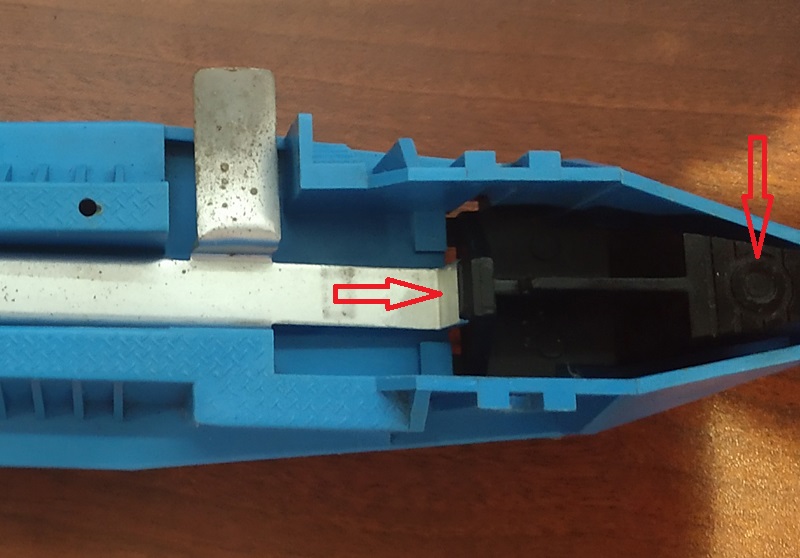
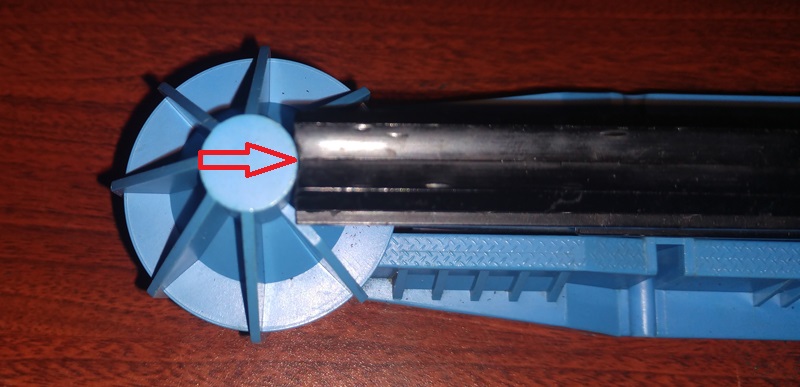
Check the spring bellows. There is a spring, bellows cover, washer and locking washer that holds this together as shown by the red arrow.
The rubber bellows needs to be free of cracks and holes. It helps to slow the move so the missile isn't thrown off when it pops up before launch.
When these mechanisms are stored for an extended period in the compressed or ready state, the spring may have lost tension. This shows up as very slow elevation and not enough strength to pull the missile trigger when raising. The bellows assembly must be taken apart to access the spring to fix the problem.
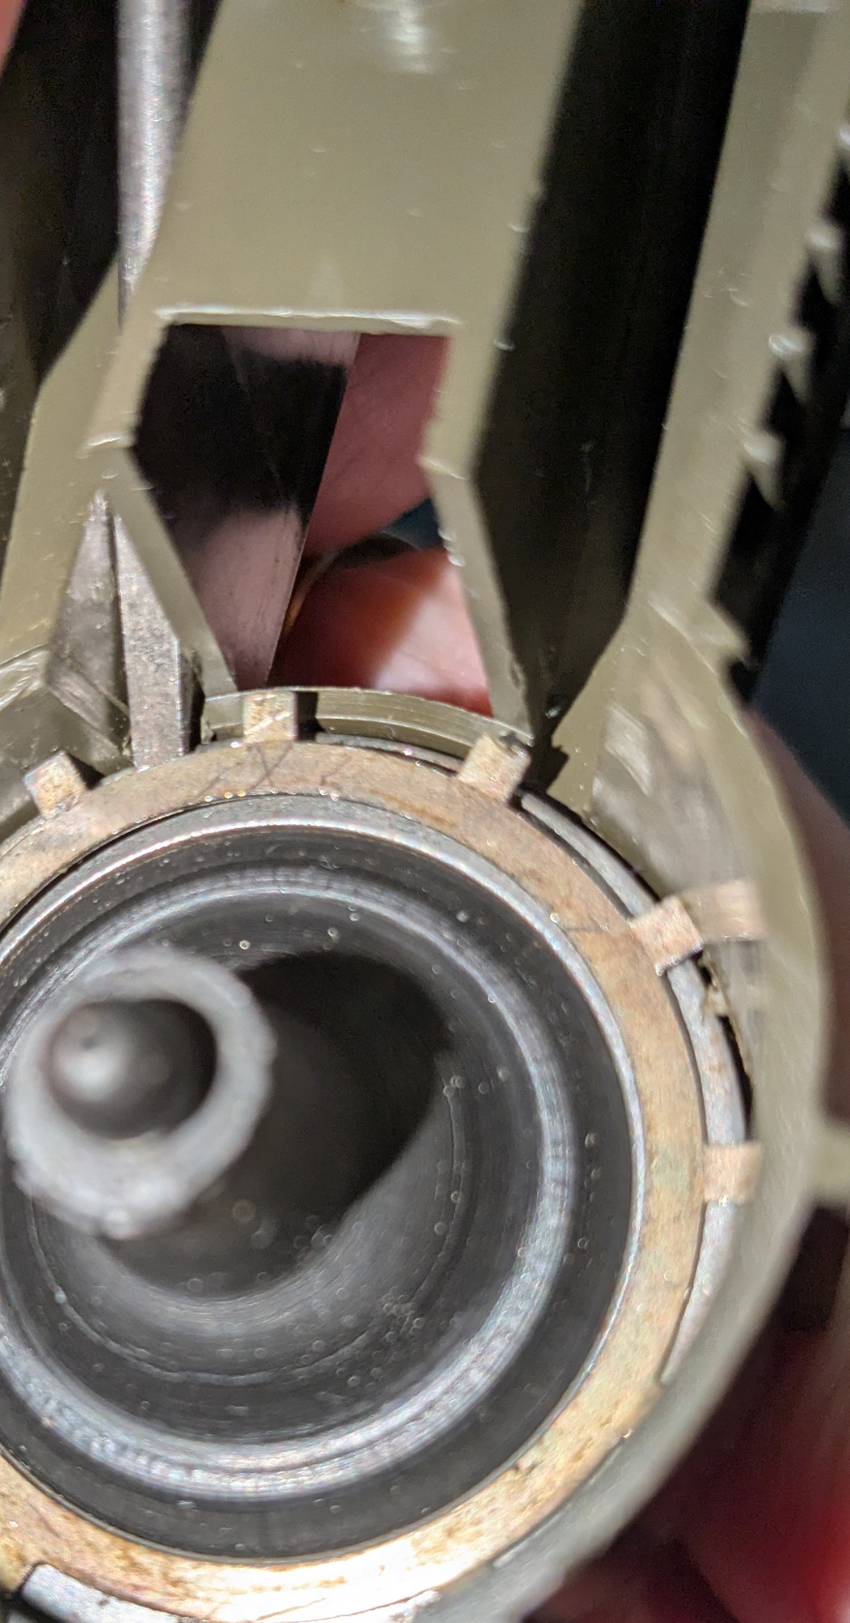
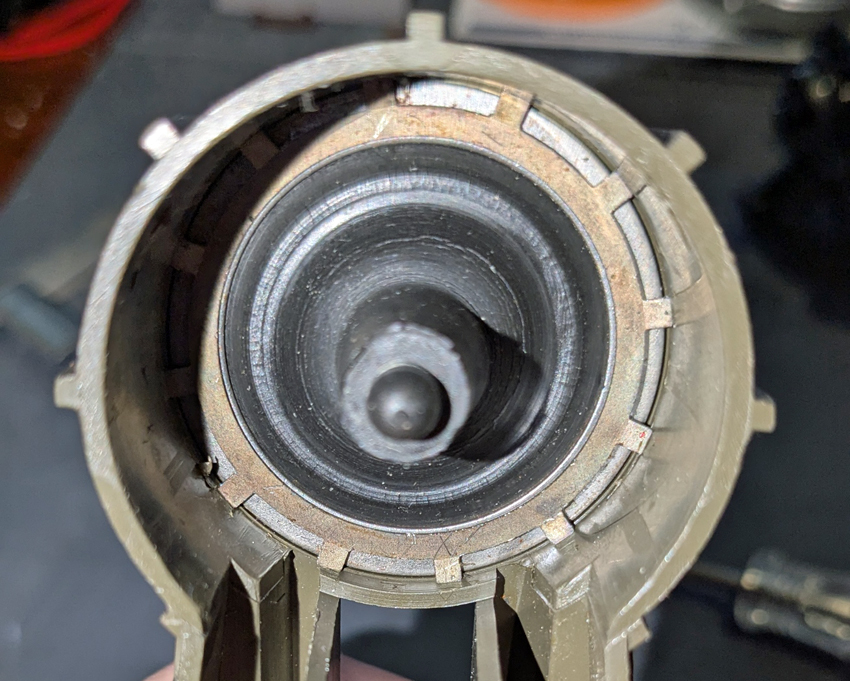
First the trigger bar pin and trigger bar must be removed as noted above. This will give free access to the bellows. Using a small screwdriver, pry the retaining ring off, starting at the low side. Once a few tabs are loose, it comes loose quickly.
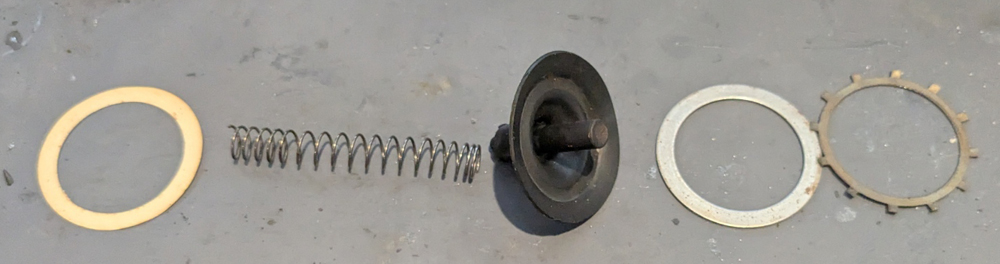
Then take the bellows apart. There is a spring, a paper gasket, a metal washer and the retainer.
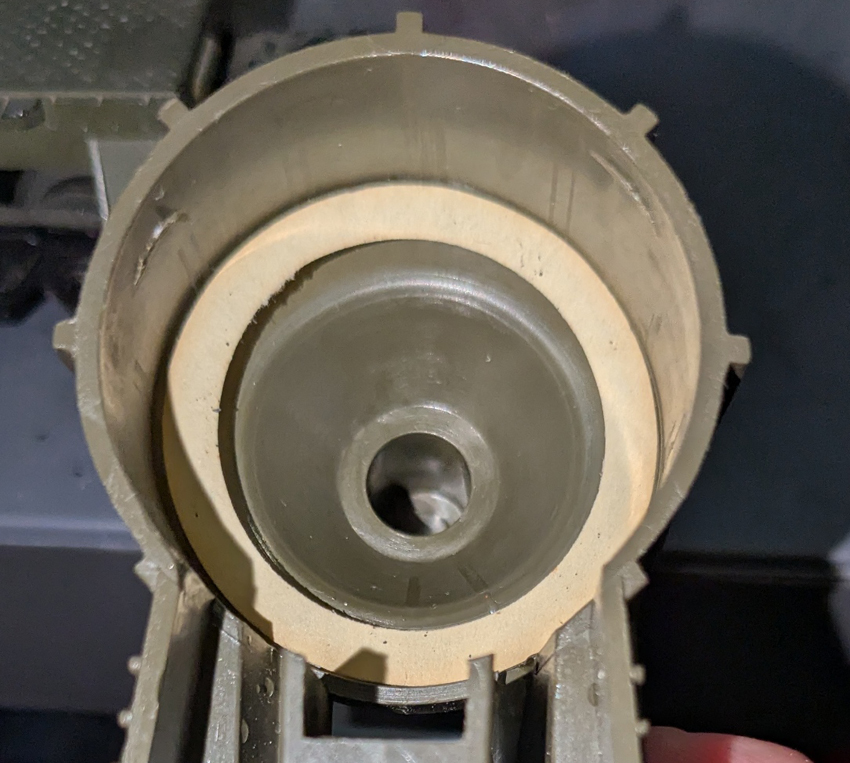
Clean out the bellows area and begin re-assembly. First the paper gasket is put in place.
Then the spring, Make sure the flat end is up, to go against the bellows. This keeps the bellows from being cut by the spring end.
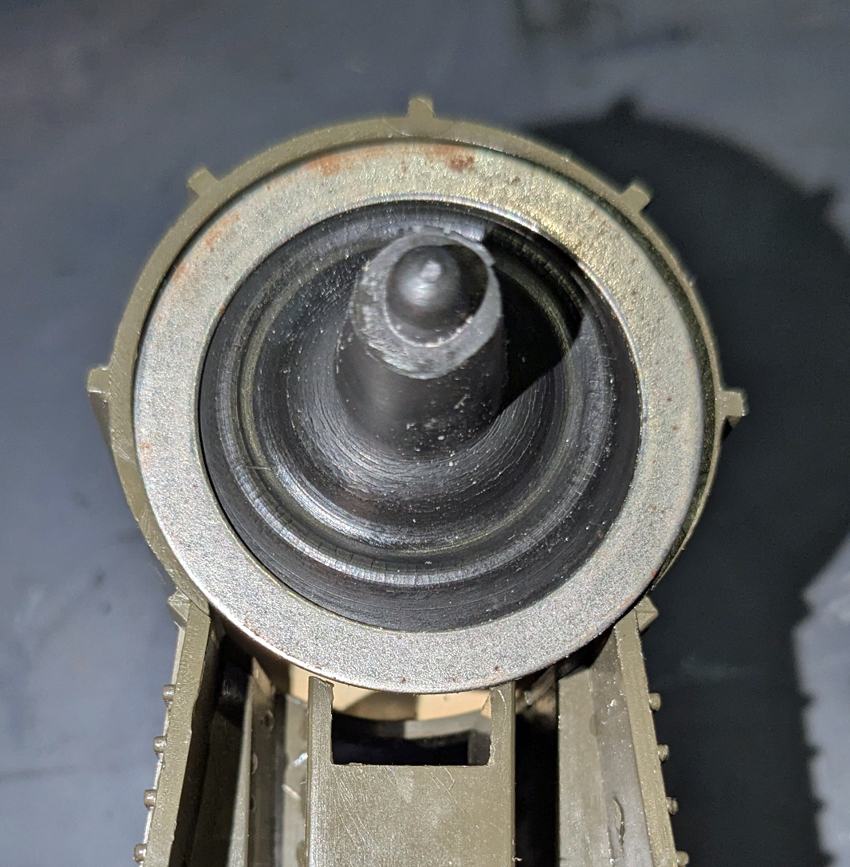
Then the bellows goes on. The shaft of the bellows goes in the spring. The round button end will go in the hole in the trigger bar.
Then the steel washer on top of the edge of the bellows.
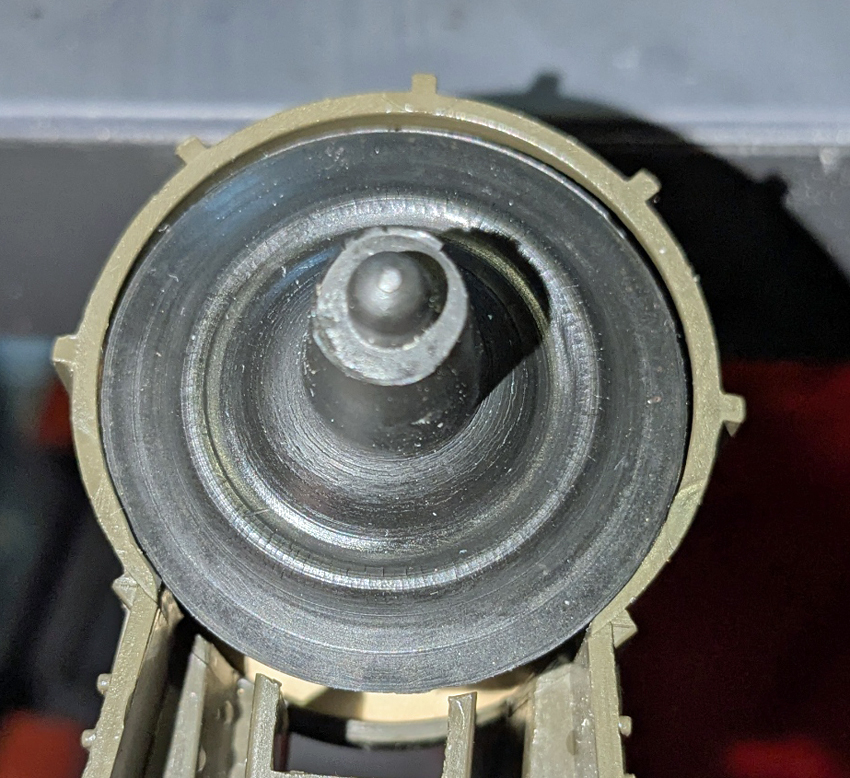
Then the retaining ring. Put the retainer with the pins pointing up on the bellows. Push the bellows down and make sure the bellows and steel ring are down. Then push the retainer down until it starts to hold. A little bit at a time in 4 or 5 places around the edge. Then using the tip of a screw driver make sure it is down tight all the way around. It may take going around the ring a few times. If loose, air escapes quickly and it jumps up too fast, throwing the missile off before launching. If the retainer and washer are down tight, it should pop up with a little hesitation. That is why the bellows cannot have holes in it.
These units should not be stored in the ready-locked position. They should be stored in the after launch position. This will prevent the spring from being "compressed" again.
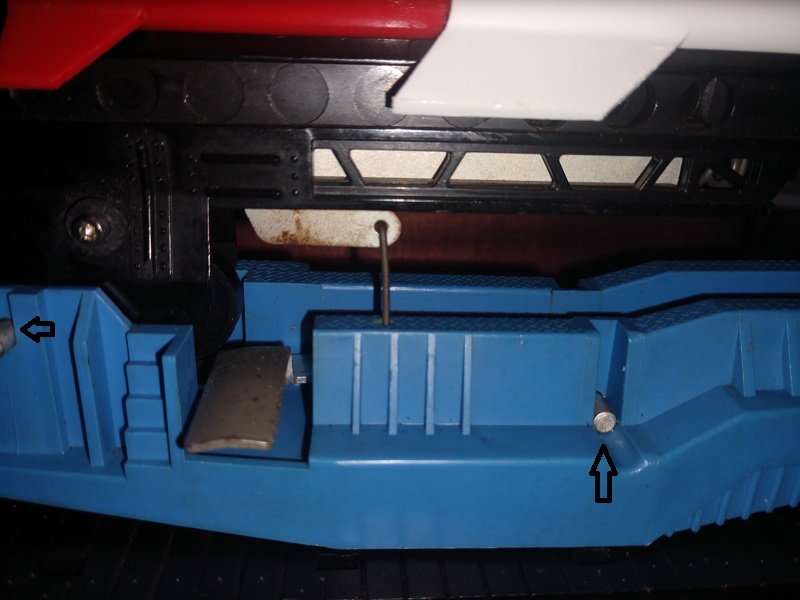
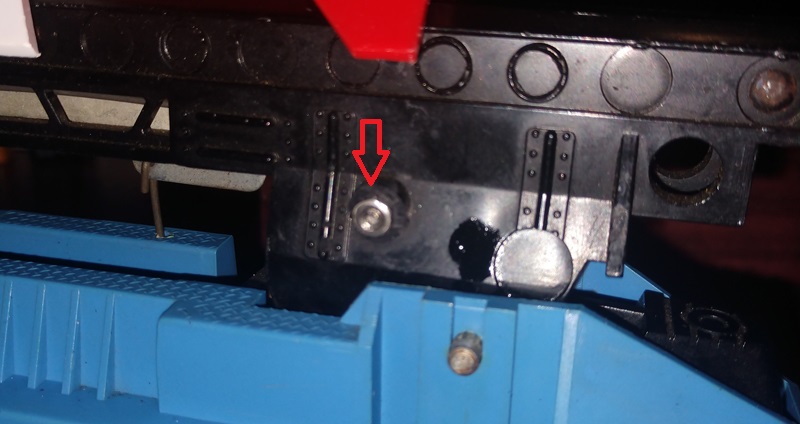
Check the fingers of the trigger button. Make sure both are there. They fit in the slots underneath the base.
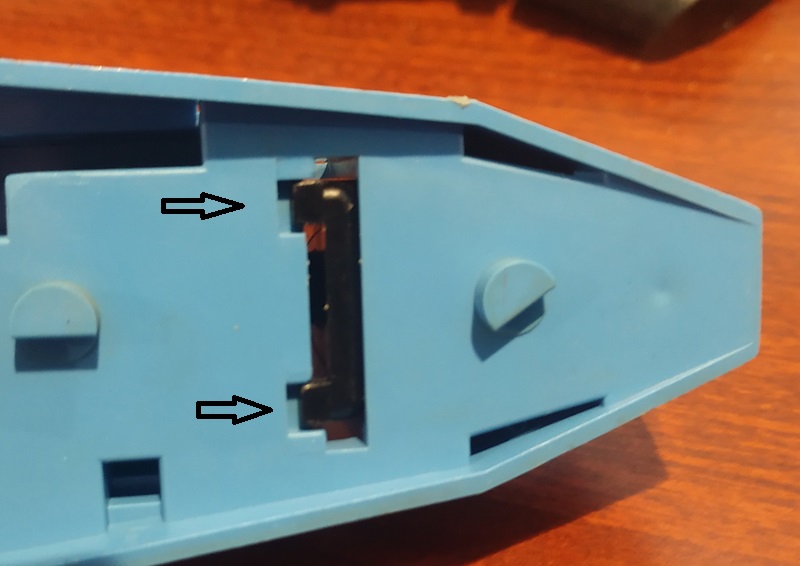
The red arrow on the right shows where there is a coil spring under the trigger button. Make sure the trigger button is in place. The spring pushes the button up for locking. It also goes around a boss in the base
After checking and cleaning the pivot bar, put it back in now. Make sure you put the pin in the same direction. it will be the short pin.
Make sure the bend at the back hooks well with the trigger button. You should be able to push the pivot bar down and have it lock under the trigger button latch. If the latch has been broken on the trigger button, you will need to replace the trigger button.
Showing the pivot for the trigger bar from the bottom. Watch that you don't drop out the trigger button when looking at the bottom. A very small drop of oil could be used on the pivot pin.
Now time to put it back together and check clearances. Don't forget to put the L shaped trigger bar back in it's hole first.
Once assembled check the clearance of the launcher and the base. On mine there was an interference that caused the launcher to stick down. Time & spring pressure and just toy tolerances could have caused it. Some filing with a round file on the end of the launcher made clearance. No more sticking.
All back together. The launcher was designed not to need oil. The only areas I would oil is on the 2 pivot pins, but only a small drop of plastic friendly oil.
Back to Main page.
Last Update Feb 1 2025